Introduction: The Ultimate Restraint for Advanced Rope Players
Hogtie bondage alone already places a submissive in a helpless, restrictive position. Suspension bondage takes that restraint into the air. When combined, hogtie suspension creates a form of BDSM rope play that’s intense, visually dramatic, and physically demanding.
But this tie is not for beginners.
This article is a comprehensive breakdown for riggers and rope bottoms who want to understand what it takes to safely execute a hogtie suspension. You’ll learn the theory, gear requirements, safety concerns, variations, and scene protocols — as well as real-world experiences from Singapore-based players.
What Is a Hogtie Suspension?

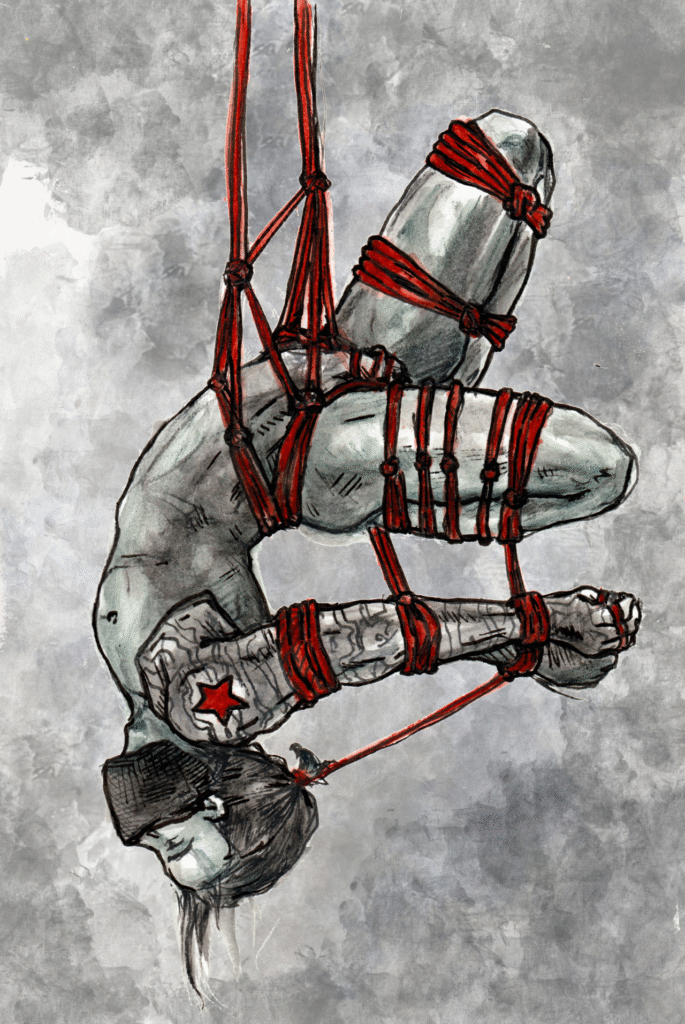
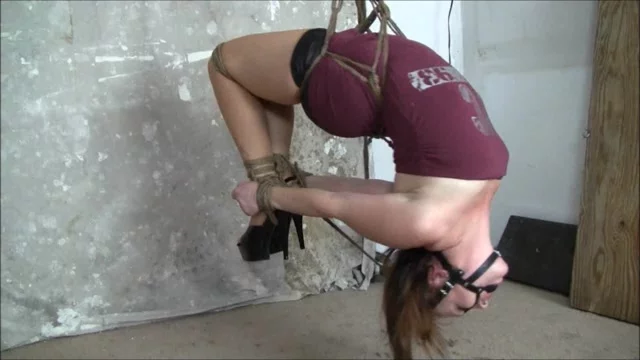
Hogtie suspension involves placing a person in a hogtie position — where the ankles and wrists are bound behind the back — and then partially or fully lifting them off the ground using suspension lines attached to an anchor point.
Key Features of a Hogtie Suspension
- Wrists and ankles are bound behind the back
- Rope connects wrists to ankles, forming a compact “arch”
- Suspension lines lift the body, partially or fully, into the air
- Typically performed face-down (prone), but can be modified
Why Combine Hogtie With Suspension?
1. Full Physical Immobility
This is one of the most restrictive positions possible. The limbs are not only bound but pulled together and suspended, creating total immobility.
2. Psychological Impact
Hogtie suspensions tap into feelings of exposure, submission, helplessness, and trust. Many rope bottoms report a deeply altered headspace during this kind of scene.

3. Visual Performance
Photographers and performance riggers often use this position for its sculptural quality. The body curves naturally under tension, and the suspended form is visually striking.

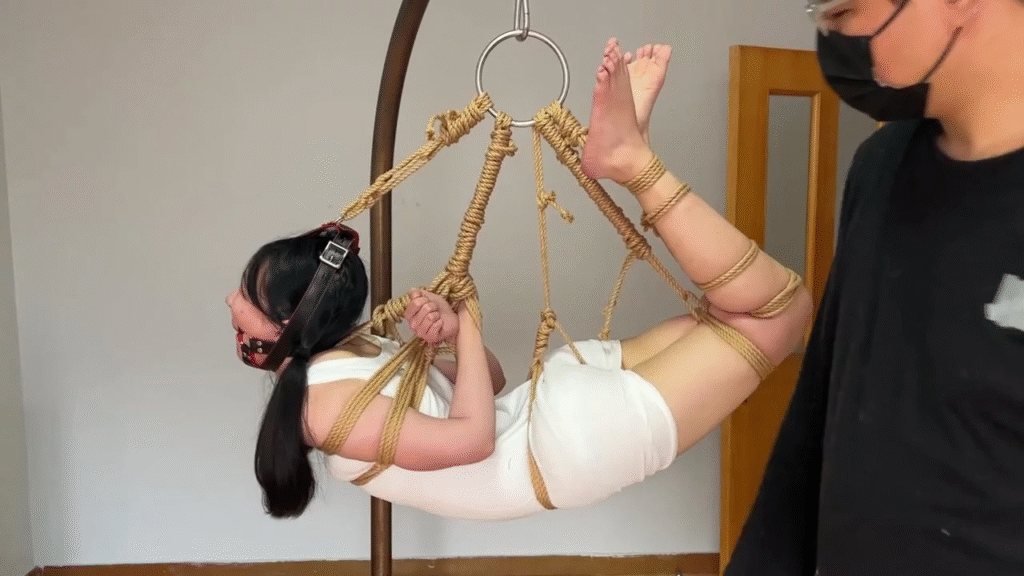
Types of Hogtie Suspensions
Partial Hogtie Suspension
Description
Only part of the body is lifted — e.g. legs or upper torso — while other parts remain grounded. This is ideal for introducing suspension to a floor-based hogtie scene.
Use Case
- Transition scene from floor to partial lift
- Allows adjustments and monitoring
- Suitable for intermediate players
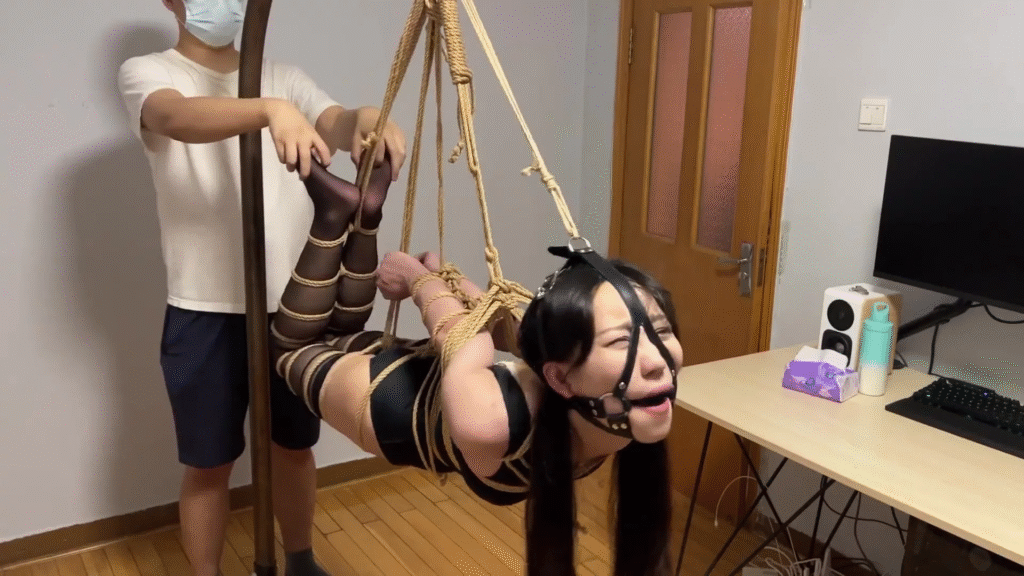
Full Prone Hogtie Suspension
Description
The entire body is suspended in the classic face-down hogtie shape. All limbs are off the ground, typically using multiple suspension points.
Use Case
- Performance and photography
- Advanced scenes with experienced bottoms
- High difficulty due to full body strain
Reverse (Supine) Hogtie Suspension
Description
The submissive lies on their back in a reverse hogtie, and is then lifted with tension distributed across limbs and torso.
Use Case
- Unique pressure points
- Less spinal compression than prone version
- Often used for aesthetic variety or breath-play alternatives
Safety Considerations for Hogtie Suspensions
1. Nerve Compression Risks
- Primary zones: wrists, forearms, upper arms, knees, ankles
- Suspension pressure can press rope into nerve paths like the radial and peroneal nerves
- Monitor for numbness, tingling, or limb “drop”
2. Circulatory Stress
- Hogties concentrate rope tension around joints
- Suspension can further reduce circulation
- Observe skin color, temperature, and responsiveness of fingers/toes
3. Positional Asphyxia
- A tightly compressed hogtie in a prone suspension compresses the chest and limits diaphragm movement
- Avoid pairing with gags or breath control unless under expert supervision
4. Structural Integrity
- Anchor points must be properly rated (minimum 300kg working load)
- All carabiners, rings, and lines must be load-bearing
- Do not improvise with household hooks, pipes, or non-rated gear
Rope and Rigging Requirements
Anchor System
- Solid overhead beam, hardpoint, or rigging frame
- Load-rated carabiners or suspension ring
- Optional pulley system for gradual elevation
Rope Type
- 6mm jute or hemp recommended
- Avoid stretchy synthetic ropes (like nylon)
- Pre-conditioned for skin safety and handling
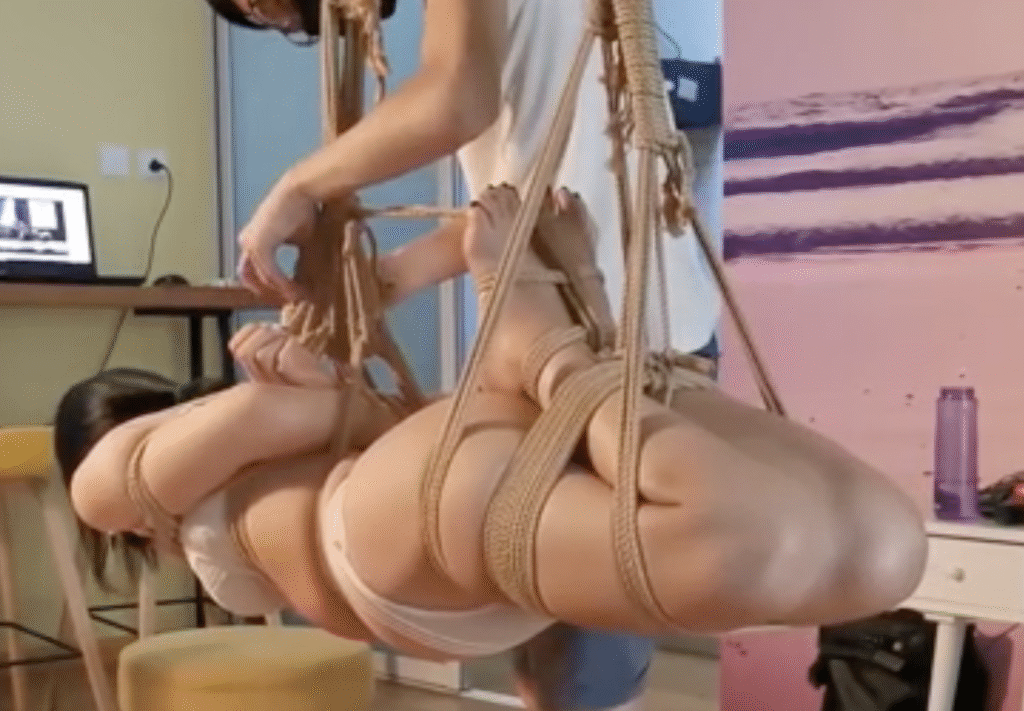
Suspension Line Setup
- Use a four-point lift: hips, shoulders, ankles, and chest
- Do not lift from wrist/ankle ties alone — they are for restraint, not load-bearing
- Tie support ropes around the body (harness-style) to distribute load safely

How to Structure a Hogtie Suspension Scene
Pre-Scene Checklist
| Item | Description |
|---|---|
| Negotiation | Discuss duration, signals, and scene intensity |
| Gear Check | Safety shears, clean rope, rated anchor points |
| Warm-Up | Floor-based ties first to assess mobility and stress response |
| Safe Signal | Non-verbal signal system (drop ball, hum, tap) |
Scene Flow
- Bind wrists and ankles in hogtie form on the ground
- Add rope support around chest and hips
- Begin partial lift, assess body reaction
- Transition to full lift if conditions are safe
- Constantly check tension, comfort, and communication
- Lower slowly and with control
Post-Scene Care
- Untie slowly, starting from suspension lines
- Provide blankets, hydration, reassurance
- Watch for delayed nerve symptoms or emotional drop
Real Experiences from Singapore Rope Players
Clara, 30 (anonymous rope bottom)
“My first full hogtie suspension was intense. I felt exposed and compressed, but also incredibly connected to my rigger. The key was communication — we paused every few minutes and debriefed after. Now it’s one of my favorite forms of rope play.”
Kelvin, 39 (anonymous rigger)
“You can’t shortcut this kind of scene. I only attempt hogtie suspensions with bottoms I’ve tied for months. If you don’t fully know someone’s reactions, flexibility, and limits, you’re playing with serious risk.”
How This Differs from Floor-Based Hogties
| Feature | Floor Hogtie | Hogtie Suspension |
|---|---|---|
| Difficulty | Intermediate | Advanced |
| Risk Level | Moderate | High |
| Duration | 15–25 minutes | 2–5 minutes max |
| Setup Time | 5–10 minutes | 20–30 minutes |
| Emotional Impact | Grounded | Floating, exposed |
Common Mistakes to Avoid
- Lifting from wrist/ankle ties without body support
- Skipping warm-up scenes
- Using non-rated gear
- Letting the rope bottom hang for too long
- Neglecting aftercare or failing to debrief
- Rushing into suspension without long-term practice
Final Thoughts
Combining hogtie bondage with suspension requires technical skill, mutual trust, and deep knowledge of human anatomy. It’s not something to improvise or try solo. With careful planning, good communication, and proper gear, this form of restraint can become one of the most intense and rewarding rope experiences in your playbook.
Join our free lifetime membership for access to free lifetime bondage content